

If you’re wondering how long to cook a Boston butt in an electric roaster, you’ve come to the right place. We’ve got all the information you need to make a mouthwatering, tender roast your family will love.
To cook a Boston butt in an electric roaster, aim for a temperature of 225-250°F and cook it for 1.5 hours per pound. For example, an 8-pound roast would require around 12 hours of cooking time. In fact, a study found that cooking low and slow at this temperature range results in a roast that’s both tender and full of flavor.
In this comprehensive guide, we will provide you with the necessary knowledge, techniques, and tips to expertly cook a Boston butt in an electric roaster, ensuring a delectable and tender roast that your family and friends will rave about

- Importance of cooking time and temperature for a perfect roast
- Preparing Your Boston Butt for the Electric Roaster
- Electric Roaster vs. Oven: What’s the Difference?
- Best Roasters For Cooking Boston Butt
- 7 Things to Consider When Purchasing an Electric Roaster
- Resting, Shredding, and Serving Your Boston Butt
- Frequently Asked Questions
- Conclusion
Importance of cooking time and temperature for a perfect roast
Boston butt, also known as pork shoulder, is a flavorful and relatively inexpensive cut of meat that comes from the upper part of the pig’s shoulder. It’s a popular choice for slow cooking, barbecue, and making pulled pork due to its marbling and rich, succulent taste.
When it comes to cooking Boston butt, the key to a perfect roast lies in the cooking time and temperature. Taking a conversational approach, let’s talk about why this is so important. Cooking at a lower temperature for an extended period allows the connective tissue to break down, resulting in tender, juicy meat that’s easy to pull apart. By carefully monitoring the temperature and cook time, you’ll achieve a mouthwatering, tender roast that will impress your family and friends.
Preparing Your Boston Butt for the Electric Roaster
You know what they say – failing to prepare is preparing to fail! Let’s get that Boston butt ready for a star performance in the electric roaster.
Choosing between bone-in or boneless
When it comes to choosing between a bone-in or boneless Boston butt, both options have their pros and cons. Bone-in cuts often have more flavor due to the marrow in the bone, but they may take a bit longer to cook. On the other hand, boneless cuts offer more even cooking and easier carving. Ultimately, it’s a matter of personal preference, so go with what tickles your taste buds!
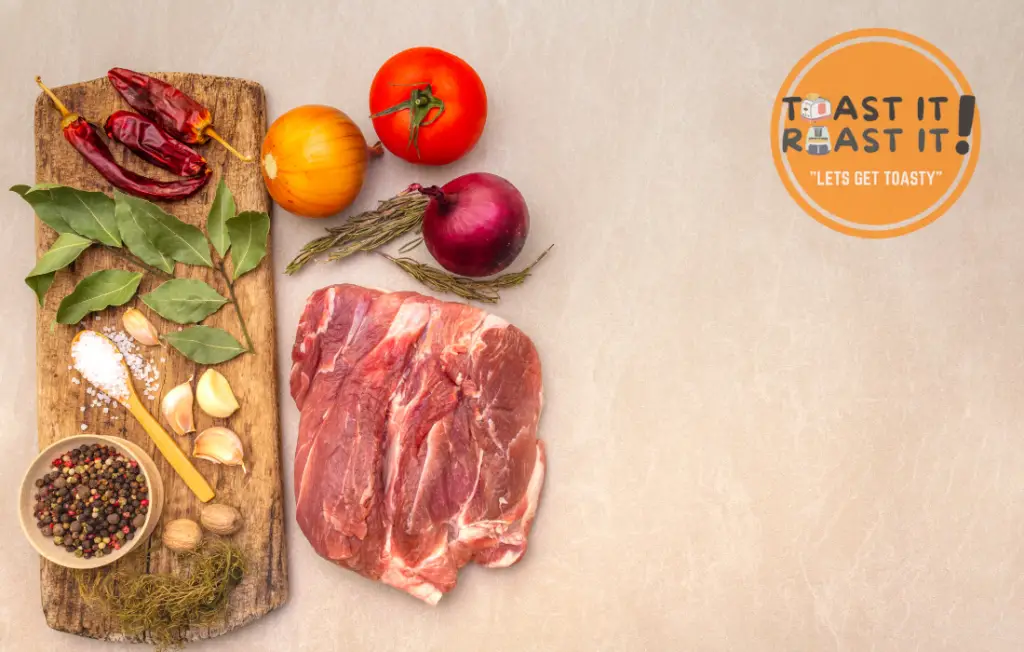
Seasoning and marinating your Boston butt
A well-seasoned Boston butt can make all the difference in taste. Begin by patting the roast dry with paper towels to remove excess moisture. Next, apply a generous amount of your preferred dry rub, covering all surfaces of the meat. You can also marinate the roast for at least 4 hours, or overnight for the best results. Experiment with various herbs, spices, and marinades to find the flavor profile you love the most.
Injecting vs. marinating for flavor
I have always been a fan of fusion foods and experimenting with flavors. When it comes to getting those delicious tastes into your Boston butt, both injecting and marinating have their merits. Research shows that injecting allows flavors to penetrate deeper into the meat, resulting in a more uniform taste. Marinating, on the other hand, works primarily on the surface of the meat, but can still result in a flavorful crust. Consider combining both methods for a tasty roast with a bit of that toasted and roasted flair I love so much!

Succulent Boston Butt in an Electric Roaster
Discover the simple joy of cooking a succulent Boston butt in an electric roaster. This foolproof recipe offers a tender, flavorful roast that’s perfect for family dinners or festive occasions.
- Total Time: 6 hours and 20 minutes
- Yield: 10 1x
Ingredients
- 1 Boston butt roast (6–8 lbs)
- 2 tablespoons salt
- 2 tablespoons black pepper
- 2 tablespoons paprika
- 2 tablespoons brown sugar
- 1 teaspoon cayenne pepper
- 4 cloves of garlic, minced
- 1 cup apple juice (for injecting, optional)
Instructions
- Preheat your electric roaster to 275°F.
- Combine the salt, black pepper, paprika, brown sugar, cayenne pepper, and minced garlic to create your dry rub.
- Rub the mixture evenly over the Boston butt.
- If desired, inject the apple juice into various spots in the roast.
- Place the Boston butt in the roaster and cook for approximately 5-6 hours, or until the internal temperature reaches 195-205°F.
- Allow the roast to rest for 20-30 minutes before shredding.
- Serve and enjoy!
Notes
Feel free to adjust the spice level to your liking. Injecting the roast with apple juice is optional but highly recommended for added moisture and flavor.
- Prep Time: 20 minutes
- Cook Time: 5-6 hours
- Category: Main Course
- Method: Roasting
- Cuisine: American
- Diet: Gluten Free
Electric Roaster vs. Oven: What’s the Difference?
So you might be wondering, “Why should I use an electric roaster when I have a perfectly good oven?” Well, there are some key differences between these two cooking methods that might sway you one way or the other.

Pros and cons of each method
Let’s dive into the advantages and disadvantages of cooking your Boston butt in an electric roaster versus an oven:
| Factors | Electric Roaster | Oven |
|---|---|---|
| Energy Efficiency | More energy efficient, resulting in lower energy cost | Less energy efficient, potentially higher energy cost |
| Space | Frees up oven space for other dishes | Requires oven space, limiting the capacity for other dishes |
| Portability | Can be used anywhere with an electrical outlet | Fixed in place, not portable |
| Heat Distribution | Can sometimes have uneven heat distribution | Even heat distribution, offering consistent cooking |
| Moisture Retention | Often better at retaining moisture in the meat | May require more basting to retain moisture in the meat |
| Additional Appliance | Takes up counter space, adds another appliance to your kitchen | No need for an additional kitchen appliance, saving space |
| Learning Curve | May require adjusting cooking times and techniques | Familiarity with cooking times and settings for most users |
By comparing the factors above, you can determine whether an electric roaster or oven is the better choice for cooking your Boston butt, depending on your individual needs and preferences. Each method has its unique benefits and drawbacks, so choose the one that best aligns with your cooking style and goals.
Best Roasters For Cooking Boston Butt
7 Things to Consider When Purchasing an Electric Roaster
Ready to invest in an electric roaster for your kitchen? Here are seven key factors to consider before making your decision:
- Size and Capacity: Determine the size of the roasts or dishes you plan to cook most often. Make sure the electric roaster you choose has a sufficient capacity to accommodate your needs. Also, consider the available counter and storage space in your kitchen.
- Temperature Range: Look for an electric roaster with a wide temperature range, typically between 150°F to 450°F, allowing you to cook a variety of dishes from low and slow to high and fast.
- Even Heat Distribution: Opt for a roaster with even heat distribution to ensure consistent cooking results. Some roasters have a built-in heating element around the cooking well, while others use the lid to circulate heat.
- Ease of Use and Cleaning: Select an electric roaster with user-friendly controls, easy-to-read temperature settings, and a removable cooking well for hassle-free cleaning.
- Build Quality and Durability: Choose an electric roaster made of high-quality materials, such as stainless steel, that will withstand frequent use and resist wear and tear.
- Additional Features: Consider any extra features that may be important to you, such as a roasting rack, a built-in timer, or a self-basting lid that locks in moisture.
- Budget and Warranty: Finally, establish your budget and compare roaster models within your price range. Don’t forget to check the warranty for each model, as this can be an indicator of the manufacturer’s confidence in the product’s longevity and performance.
By taking these factors into account, you’ll be well on your way to finding the perfect electric roaster to enhance your cooking experience and help you create delicious, tender Boston butt roasts and more.
Resting, Shredding, and Serving Your Boston Butt
Now that your Boston butt is cooked to perfection, let’s talk about resting, shredding, and serving your masterpiece.
How long to rest before shredding
Allow your cooked Boston butt to rest for at least 20-30 minutes before shredding. This resting time lets the juices redistribute within the meat, ensuring a moist and tender roast when you shred it.
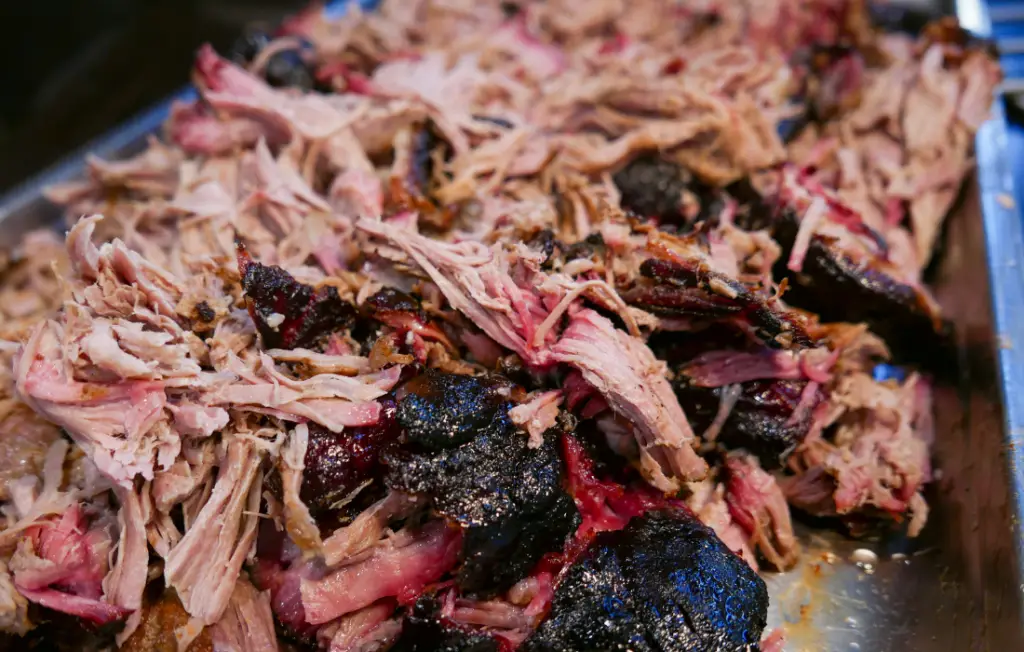
Tips for shredding and plating
I can’t help but share some of my go-to tips for shredding and plating like a pro:
- Use two forks or shredding claws to pull the meat apart effortlessly.
- Remove any excess fat or gristle for a lean, tasty dish.
- Drizzle some cooking juices over the shredded meat to boost the flavor.
- Presentation matters! Pile the shredded meat high on a platter and garnish with fresh herbs or a sprinkle of your dry rub.
Best side dishes for your Boston butt
Complement your Boston butt with some delicious side dishes:
- Classic coleslaw for a refreshing crunch
- Creamy mac and cheese for the ultimate comfort food pairing
- Grilled or roasted veggies for a healthy touch
- Baked beans for a hearty, saucy accompaniment
- Warm, soft dinner rolls for mopping up those flavorful juices
Frequently Asked Questions
Should I cover the roast when cooking?
There’s no need to cover the roast when cooking in an electric roaster, as it already provides a moist environment. However, if you feel the roast is drying out, you can tent it with aluminum foil.
Do I need to baste the roast?
With an electric roaster, basting is usually not necessary since it retains moisture well. If you’d like, you can baste once or twice during the cooking process to add extra flavor.
How to store and reheat leftovers?
Speaking from experience, leftovers are a beautiful thing! Store your leftover Boston butt in an airtight container in the fridge for up to 3-4 days. To reheat, place the meat in a baking dish, add a splash of water or cooking juices, cover with foil, and warm it in a preheated oven at 300°F until heated through (about 20-30 minutes).
Conclusion
So, there you have it – a comprehensive guide on how to cook a scrumptious Boston butt in an electric roaster. To sum it up (conversational style, of course), we’ve discussed everything from preparation, cooking times and temperatures, electric roasters versus ovens, and even what to consider when buying an electric roaster. We also explored the resting, shredding, and serving process, as well as answered some frequently asked questions.
Jay, how long to cook a 15lb pork butt with the recipe above in an electric roaster?
For a 15 lb pork butt in an electric roaster, set the temperature to 275°F. Cook for approximately 1 hour per pound, making it around 15 hours in total. Ensure the meat’s internal temperature reaches 200°F to 205°F for pull-apart tenderness. Let it rest for 20-30 minutes before serving